
Explore a comprehensive guide on installing outdoor lights on vinyl siding. Learn step-by-step instructions, How to install an outdoor light on vinyl siding safety measures, and tips to seamlessly integrate stylish lighting with your home exterior.
Preparation Steps
Before embarking on the installation of outdoor lights on vinyl siding, meticulous preparation is crucial. Start by assembling the necessary tools, including a drill, screws, and a voltage tester. Ensure the power source is safely turned off to prevent electrical hazards. Thoroughly inspect the chosen location, considering the siding material and structure. Verify that the fixture is suitable for vinyl siding, meeting both aesthetic and practical requirements. Additionally, familiarize yourself with the installation instructions provided by the manufacturer. Adequate preparation ensures a smooth process, minimizes setbacks, and lays the foundation for a secure and visually pleasing integration of outdoor lighting with your vinyl siding.
Selecting the Right Fixture
Choosing the appropriate outdoor light fixture is pivotal for a successful integration with vinyl siding. Opt for fixtures explicitly designed for exterior use and compatible with vinyl materials. Consider the style that complements your home’s aesthetics while ensuring functionality. Verify the fixture’s dimensions, ensuring it aligns with the selected installation location. Prioritize weather-resistant materials to withstand outdoor elements and promote durability. Research compatibility with LED or other energy-efficient bulbs for long-term efficiency. A thoughtfully chosen fixture not only enhances the visual appeal of your home but also ensures a seamless and secure installation on vinyl siding. Select wisely for an illuminating and aesthetically pleasing outdoor lighting solution.
Measuring and Marking
Accurate measurement and precise marking are crucial steps when installing outdoor lights on vinyl siding. Use a measuring tape to determine the ideal placement, considering both aesthetic and functional aspects. Mark the designated spots with a pencil or chalk, ensuring alignment with the chosen fixture’s dimensions. Take into account any architectural features or obstructions that might affect the placement. Careful measurement and marking lay the foundation for a visually pleasing and well-balanced integration of outdoor lighting, enhancing the overall appearance of your home while ensuring a secure and professional installation on vinyl siding.
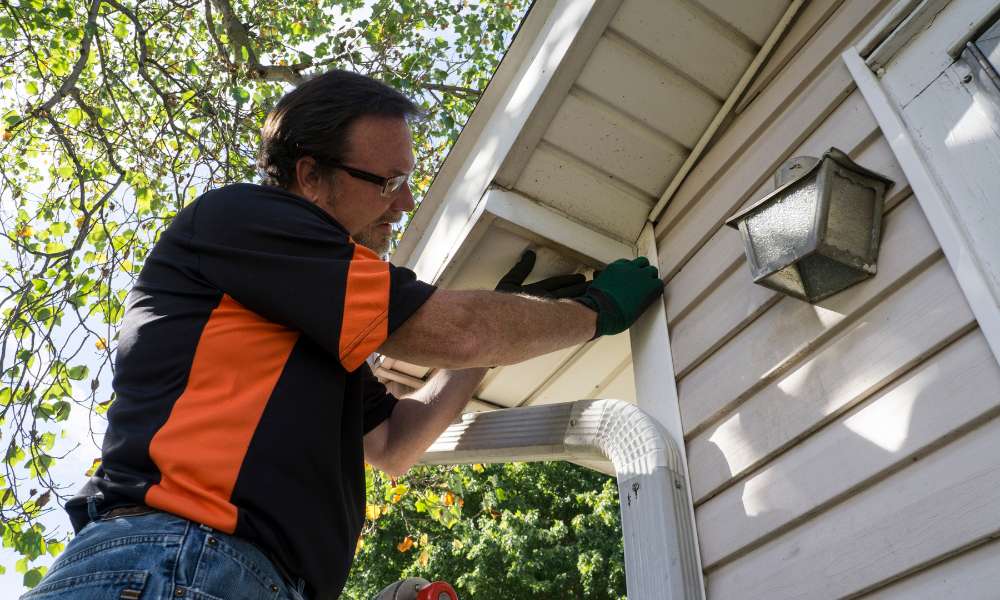
Drilling and Mounting
Drilling and mounting are pivotal stages in the installation of outdoor lights on vinyl siding. Begin by selecting the appropriate drill bit for your siding material and carefully drilling holes at the marked locations. Ensure precision to facilitate a secure fit. Subsequently, mount the light fixture onto the siding, aligning it with the drilled holes. Use appropriate screws to affix the fixture firmly, taking care not to overtighten. Consider the fixture’s weight and dimensions during mounting for optimal stability. This meticulous approach ensures a seamless integration, preventing potential damage to the siding while providing a secure foundation for your outdoor lighting fixture on vinyl siding.
Wiring Connection
Achieving a safe and efficient wiring connection is paramount when installing outdoor lights on vinyl siding. Begin by carefully following the manufacturer’s instructions for wiring placement. Use a voltage tester to confirm that the power is off before proceeding. Employ weather-resistant electrical boxes to protect connections from the elements. Connect the wires according to color codes, securing them tightly to prevent any loose connections. Safely route the wiring through the designated openings in the light fixture and the siding. This meticulous wiring process ensures a reliable and durable electrical connection, promoting the longevity and optimal functionality of your outdoor lighting on vinyl siding. Prioritize safety and adherence to guidelines for a successful installation.
Sealing and Weatherproofing
Sealing and waterproofing are crucial measures for safeguarding structures against the elements. By employing specialized materials such as sealants, caulks, and weatherstripping, vulnerable entry points like windows, doors, and gaps are fortified. These protective barriers act as a shield, preventing moisture intrusion, air leaks, and temperature fluctuations. Effective sealing enhances energy efficiency, reducing heating and cooling costs while ensuring interior comfort. Moreover, it safeguards against potential structural damage caused by water infiltration. Whether in residential or commercial settings, investing in thorough sealing and weatherproofing not only preserves the integrity of buildings but also promotes sustainability by curbing energy wastage and minimizing environmental impact.
Testing and Adjustments
Testing and adjustments are integral components of optimizing performance in various systems and processes. Whether in manufacturing, software development, or mechanical operations, rigorous testing procedures identify flaws, ensuring products or systems meet stringent quality standards. Fine-tuning through adjustments follows, refining parameters for optimal functionality. In software, debugging and beta testing refine codes, enhancing user experience and system stability. In mechanical engineering, precision adjustments optimize machinery efficiency, reducing wear and tear. Calibration in scientific instruments ensures accurate measurements. Comprehensive testing not only guarantees reliability but also enhances safety and longevity. Continuous improvement relies on this iterative cycle, where each testing phase informs adjustments, fostering innovation and reliability across diverse industries, ultimately delivering products and services that meet or exceed user expectations.
Post-Installation Maintenance
Post-installation maintenance is a critical aspect of ensuring sustained functionality and longevity of installed systems or equipment. Following the initial setup, regular inspections, and upkeep activities become imperative to identify and address potential issues. This includes checking for wear and tear, updating software, and replacing worn components. In sectors ranging from technology to construction, adherence to a well-structured maintenance regimen enhances reliability, minimizes downtime, and safeguards against unforeseen breakdowns. Proactive measures like lubrication, calibration, and system diagnostics contribute to optimal performance, preventing costly repairs. Post-installation maintenance not only extends the lifespan of installations but also supports operational efficiency, delivering consistent and reliable outcomes over the long term. Regular attention to upkeep ensures that the benefits of the initial installation endure, meeting performance expectations and maximizing return on investment.
Conclusion
the significance of thorough sealing, weatherproofing, testing, adjustments, and post-installation maintenance cannot be overstated. These practices collectively safeguard structures, optimize system performance, and ensure sustained functionality. From fortifying against environmental elements to refining intricate processes, each step plays a vital role in enhancing longevity and reliability. The commitment to regular upkeep not only mitigates risks but also contributes to long-term cost savings and operational efficiency. As a holistic approach, these measures serve as pillars supporting the resilience and efficacy of diverse systems, laying the foundation for sustained success in various industries. Prioritizing these practices is an investment in durability, functionality, and overall performance.