
Transforming your dining room table with chalk paint can breathe new life into your space, offering a fresh, customized look. Chalk paint is renowned for its versatility, ease of use, and matte finish, making it a popular choice for DIY enthusiasts and professional decorators alike. Whether you’re aiming for a rustic, vintage, or modern aesthetic, chalk paint provides endless possibilities to suit your style. In this guide, we will explore a variety of chalk paint dining room table ideas, from selecting the perfect color to mastering the painting techniques that will elevate your dining area. Discover how to effortlessly update your furniture and create a stunning focal point in your home.
1. Choosing The Right Chalk Paint Color
Selecting the right chalk paint color is crucial in transforming your dining room table into a stunning centerpiece. The color you choose should complement your existing décor and reflect your style. Neutral tones like white, beige, and gray are popular choices for a classic, timeless look, while bold colors such as navy blue, emerald green, and deep red can make a striking statement. Consider the mood you want to create in your dining space; softer hues can evoke a calm, serene atmosphere, while vibrant colors add energy and excitement. When choosing a chalk paint color, it’s also essential to test a small area first to ensure it harmonizes with your room’s lighting and other furnishings. By thoughtfully selecting the perfect shade, you can achieve a beautifully cohesive and inviting dining room.
2. Prepping Your Dining Table Surface
Properly prepping your dining table surface is a vital step in achieving a flawless chalk paint finish. Begin by thoroughly cleaning the table to remove any dust, grease, or grime, ensuring a smooth application. Use a mild soap solution and a damp cloth, then let the surface dry completely. Next, inspect the table for any imperfections like scratches or dents; these should be sanded down to create an even base. If your table has a glossy finish, lightly sanding the entire surface will help the chalk paint adhere better. Filling in any deep gouges with wood filler and sanding again once it’s dry will ensure a seamless look. Finally, wipe the table with a tack cloth to eliminate any residual dust. This meticulous preparation process not only enhances the paint’s adhesion but also contributes to a durable and professional-looking result.
3. Applying Primer For Better Adhesion
Applying primer is a critical step to ensure better adhesion of the chalk paint to your dining table. Primer creates a smooth and even surface, allowing the paint to adhere more effectively and last longer. Start by selecting a high-quality primer suitable for your table’s material, whether it’s wood, metal, or laminate. Use a brush or roller to apply a thin, even coat of primer, making sure to cover all areas, including corners and edges. Allow the primer to dry completely, following the manufacturer’s instructions for drying time. This step not only enhances the chalk paint’s grip but also helps to block any stains or tannins from bleeding through, ensuring a clean and vibrant finish. By taking the time to apply primer, you’ll set a strong foundation for your chalk paint project, resulting in a beautifully transformed dining table.
4. First Coat Of Chalk Paint
Applying the first coat of chalk paint is an exciting step in transforming your dining table. Begin by stirring the paint thoroughly to ensure an even consistency. Using a high-quality brush or roller, apply the paint in smooth, even strokes, following the grain of the wood. It’s essential to work quickly but carefully, avoiding any drips or thick patches. The first coat might appear thin and uneven, but this is normal and will be rectified with subsequent layers. Allow the paint to dry completely, typically for at least 24 hours, before proceeding with additional coats. This drying time ensures that the paint adheres properly and sets a strong foundation for the next layer. Applying the first coat of chalk paint with precision and patience will set the stage for a beautiful, professional finish on your dining table.
5. Sanding Between Paint Coats
Sanding between paint coats is a crucial step in achieving a smooth and professional finish on your chalk-painted dining table. Once the first coat of chalk paint is completely dry, lightly sand the surface with fine-grit sandpaper, such as 220-grit. This gentle sanding removes any brush strokes, drips, or imperfections, ensuring the next coat adheres flawlessly. Wipe away the sanding dust with a tack cloth to maintain a clean surface for the next application. Sanding between coats not only helps in achieving a smoother finish but also enhances the durability and longevity of the paint. Repeat this process for each additional coat, typically two to three coats in total, to build up a rich, even color. By taking the time to sand between paint coats, you’ll ensure your dining table looks professionally finished and ready to impress.
6. Applying Additional Chalk Paint Layers
Applying additional layers of chalk paint is essential for achieving a rich, durable finish on your dining table. After sanding the initial coat, begin applying the second layer of paint using smooth, even strokes, ensuring you cover the entire surface uniformly. This second coat will start to build the depth of color and hide any imperfections from the first coat. Allow the paint to dry completely, usually for about 24 hours, before lightly sanding again to ensure a flawless surface.
Depending on the desired opacity and finish, you may need to apply a third or even fourth coat, repeating the sanding and painting process each time. Each additional layer not only enhances the table’s appearance but also contributes to a more resilient and long-lasting finish. By carefully applying multiple coats of chalk hue, you’ll achieve a beautiful, professional-quality result that transforms your dining space.
7. Creating Distressed Finishes With Chalk Paint
Creating distressed finishes with chalk paint adds a charming, vintage look to your dining table, giving it character and a sense of history. To achieve this effect, start by applying two contrasting layers of chalk hue, allowing each layer to dry completely. Once the final coat is dry, use fine-grit sandpaper to gently sand areas. Where natural wear would occur, such as edges, corners, and high-touch surfaces. Read, how to decorate a round dining table. Sand lightly to reveal the base coat or the original wood underneath, creating a naturally aged appearance. You can also use a damp cloth to wipe away some paint for a more subtle distressing effect. For added authenticity, consider using a wax or glaze to enhance the aged look and protect the surface. This distressing technique not only adds visual interest but also creates a unique, personalized piece that complements various décor styles.
8. Sealing Your Chalk-Painted Table
Sealing your chalk-painted table is the final step to ensure durability and protection, preserving the beauty of your work. After the paint has completely dried and any distressing or finishing touches are complete, choose a high-quality sealer like clear wax or a polycrylic finish. For wax, use a soft cloth or brush to apply a thin, even layer, working in small sections and buffing to a smooth sheen. If using polycrylic, apply it with a synthetic brush, ensuring even coverage and avoiding bubbles. Allow the sealer to dry according to the manufacturer’s instructions, usually 24 hours for wax or a few hours for polycrylic. Multiple coats may be necessary for high-traffic areas to enhance protection. Sealing not only adds a layer of durability but also deepens the color and sheen, providing a professional and long-lasting finish to your beautifully transformed dining table.
9. Adding Decorative Stencils Or Designs
Adding decorative stencils or designs to your chalk-painted dining table can elevate its aesthetic appeal and infuse it with a personalized touch. Begin by selecting a stencil or design that complements your overall decor and style. Position the stencil on the table and secure it with painter’s tape to prevent shifting. Using a stencil brush or sponge, apply a small amount of chalk paint, gently dabbing over the stencil to avoid bleeding.
For a more intricate look, layer different colors or designs, allowing each layer to dry before adding the next. Once the design is complete and the paint is dry, carefully remove the stencil and touch up any areas if necessary. This technique can transform your dining table into a unique piece of art, adding visual interest and a custom flair that reflects your creativity. Finish with a clear sealer to protect your design and ensure it lasts for years to come.
10. Using Wax For A Smooth Finish
Using wax for a smooth finish on your chalk-painted dining table adds a layer of protection while enhancing the overall appearance. Begin by selecting a clear or tinted wax, depending on the desired look. Use a soft, lint-free cloth or a wax brush to apply a thin, even coat of wax, working in small sections and following the direction of the wood grain. Gently rub the wax into the surface, ensuring thorough coverage without excess buildup.
After applying the wax, allow it to sit for a few minutes before buffing it with a clean cloth to achieve a smooth, polished finish. This process not only seals the paint but also adds a subtle sheen and depth to the color. Making the table more resistant to everyday wear and tear. For added durability, consider applying a second coat of wax, especially on high-traffic areas. Regular maintenance with occasional re-waxing will keep your table looking beautiful and well-protected for years.
11. Maintaining Your Chalk-Painted Table
Maintaining your chalk-painted table ensures it remains beautiful and functional for years to come. Regularly dust the table with a soft, dry cloth to prevent dirt buildup. For more thorough cleaning, use a damp cloth with mild soap and water, avoiding harsh chemicals that can damage the finish. Immediately wipe up any spills to prevent staining. Periodically check for any areas where the paint or sealant might be wearing thin, and touch up as needed to keep the surface looking fresh. Reapply wax every six months to a year, depending on usage, to maintain the protective layer and sheen. By incorporating these simple maintenance steps, you can preserve elegance. And the durability of your chalk-painted dining table, ensuring it remains a cherished centerpiece in your home.
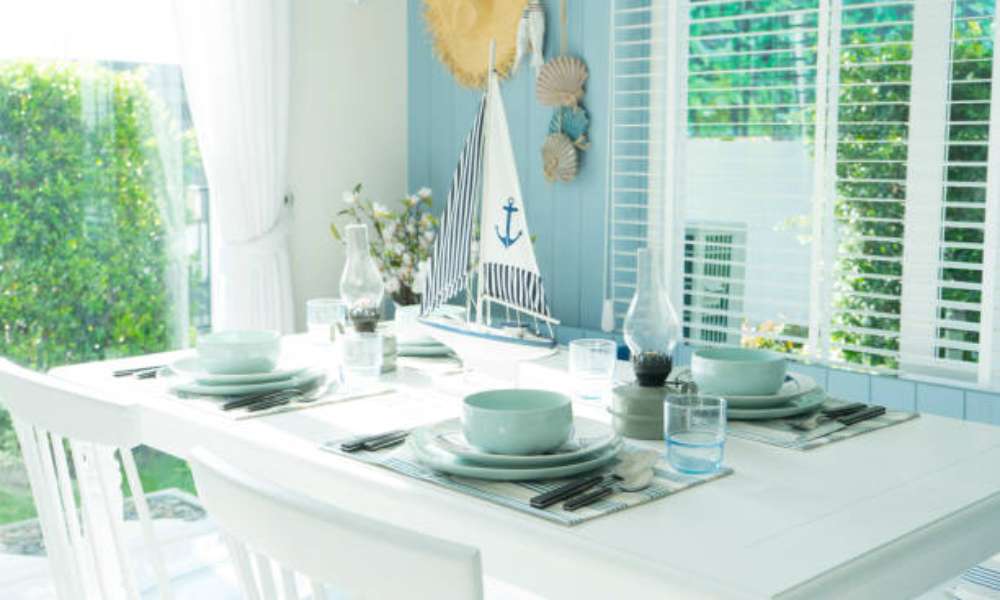
12. Styling Ideas For A Chalk-Painted Table
Styling your chalk-painted dining table can enhance its charm and seamlessly integrate it into your home decor. Begin by choosing a centerpiece that complements the table’s color and finish. Options like a rustic wooden tray with candles, a vase of fresh flowers, or a decorative bowl can add a touch of elegance. For a cohesive look, consider coordinating your table settings with the table’s hue – think placemats, napkins, and dishware in complementary colors. Adding seasonal decorations, such as autumnal foliage or festive holiday ornaments, can keep your table looking fresh and inviting throughout the year. Additionally, layering textiles like table runners or cloths can introduce texture and visual interest. Incorporating these styling ideas will highlight the beauty of your chalk-painted table, making it a stylish focal point in your dining area.
13. Chalk Paint For Different Dining Styles
Chalk paint is incredibly versatile, making it an excellent choice for various dining styles. For a rustic or farmhouse look, opt for distressed finishes in muted tones like cream, sage, or antique white, pairing them with wooden or metal accents. In a modern setting, sleek and smooth chalk hues in bold colors like navy, black, or charcoal can create a striking contrast with minimalist decor. For a vintage or shabby chic style, pastel shades and intricate stenciled designs can add a touch of whimsy and elegance. Traditional dining rooms benefit from rich, classic hues like deep red, forest green, or navy, enhanced with a glossy wax finish. By choosing the right chalk hue color and technique. You can easily tailor your dining table to match any decor style, creating a cohesive and stylish dining space that reflects your taste.
Conclusion
Transforming your dining room table with chalk paint offers endless possibilities for personalization and style. From selecting the perfect chalk hue color to applying multiple coats, and sanding between layers. And adding unique decorative touches, each step in the process contributes to creating a stunning, customized piece. Proper preparation and maintenance ensure your chalk-painted table remains beautiful and durable for years to come. Whether you prefer a rustic, modern, vintage, or traditional look, chalk hue can adapt to various styles, making it a versatile choice for any home decor. Embrace your creativity and enjoy the rewarding experience of breathing new life into your dining space with a beautifully chalk-painted table.